
Why a body sensor is not a lie detector
A sensor gives you a number, and a number looks like proof. But a skin conductance reading can rise because someone is excited, startled, nervous or just warm. If you record it carelessly, you can end up reporting a result that came from the room, not the person.
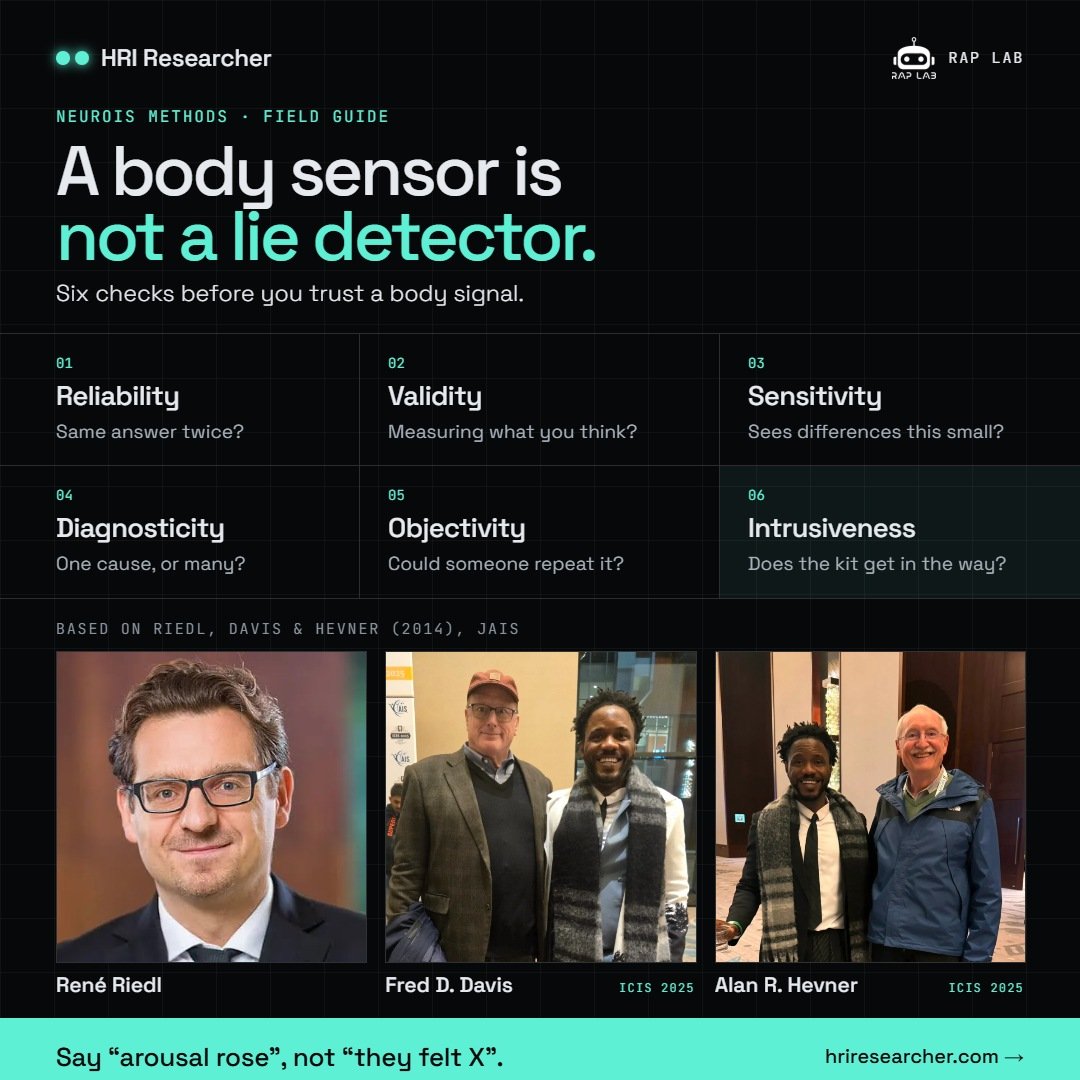
A 2014 paper in the Journal of the Association for Information Systems by René Riedl, Fred Davis and Alan Hevner is, at heart, a practical guide to avoiding that. Its one idea is to treat a body signal like any other measurement and check it on six points before you trust it. This guide turns those six points into steps you can follow in a real study.
The six checks, as plain questions:
- Reliability: if I measure again, do I get the same answer?
- Validity: am I measuring what I think I am measuring?
- Sensitivity: can the tool notice differences as small as the ones I care about?
- Diagnosticity: does the signal point to one cause, or to many?
- Objectivity: could someone else follow my notes and get the same result?
- Intrusiveness: does the equipment disturb the very thing I am studying?
You do not need a science background. If you can write a checklist and keep a lab notebook, you can apply all six.
The example we will use
Every step below uses one small study, so you can see the six checks working together. Swap in your own study when you use it.
The study: a participant watches a social robot, Furhat, greet them. Does the person treat the robot as if it has thoughts and feelings?
- Idea being measured: mind attribution, meaning how far the person treats Furhat as having thoughts and feelings.
- Body signals: skin conductance and pulse from a finger ring that records both, plus brain activity from EEG.
- Behavior: a finger-tracked choice, for example accepting or overriding the robot’s suggestion.
- Self-report: a short survey right after the interaction.
These examples are illustrations I built to make the steps easy to follow. They are not from the paper, and you should confirm equipment details with your own lab’s technicians and manuals.
Step 1: Decide exactly what you are measuring
Before you touch a sensor, write down the idea you are trying to capture. The paper says a clear, written definition is the first protection against measuring the wrong thing. This step covers the validity check.
Do this:
- Write a one-sentence definition. Example: “Mind attribution is how far a person treats Furhat as having thoughts and feelings.”
- List the sides of the idea. Most ideas show up in three places: in the body (a reaction), in the mind (what the person reports) and in action (what the person does).
- Choose at least one measure for each side you care about. The paper warns that a single measure often captures only part of an idea, or even several ideas at once, and that studies often skip this check.
In the example:
- Body side: how aroused or effortful the moment felt. Measure it with the ring’s skin conductance and pulse, and the EEG response.
- Mind side: what the person believes and reports. Use a short survey rating how much Furhat can think and feel.
- Action side: what the person does. Use the finger-tracked choice to accept or override the robot.
Write down your definition, the list of sides, and which measure covers each side.
Step 2: Choose your signals and defend each one
More sensors does not mean a better study. For every signal you plan to record, answer three questions and write the answers down. This step covers diagnosticity, sensitivity and intrusiveness.
- What else could move this signal? If many things could, it points to many causes, so you need other measures to separate them.
- Can it notice a difference as small as the one I care about?
- How much will it disturb the person or the task? The paper scores this on freedom of movement, natural body position, and how much must be attached to the body.
Applied to the example:
- Ring skin conductance. It can be moved by excitement, a startle, nerves or a warm room. It disturbs little because it sits on one finger. Keep it if you need to know how aroused the person was.
- Ring pulse. It can be moved by movement, effort, caffeine or stress. It disturbs little. Keep it if you want a stress or effort marker and do not already record heart activity another way.
- EEG. It can be moved by blinks, muscle movement and attention. It disturbs more, because the cap has many sensors and the person must stay fairly still. Keep it if you need the timing of the brain’s response.
- Facial EMG. It can be moved by natural expressions unrelated to the robot. It disturbs more, since face sensors can change expressions. Keep it if you need smile versus frown.
- Finger tracking. Many things can drive a choice. Nothing is attached to the body. Keep it if you need the path toward a decision.
- Survey. People may answer to look good. Nothing is attached to the body. Keep it if you need what the person reports.
Two practical notes. First, the BIOPAC Research Ring records skin conductance and pulse from one finger, plus temperature and movement, and ECG depends on the model (BIOPAC). If your ring already gives pulse, a separate pulse sensor may duplicate it. Second, check each tool’s manual or ask your lab technician before you rely on what it records.
Write down one sentence of justification per signal. If you cannot write it, drop the signal.
Step 3: Make the session repeatable
The paper’s sharpest point is that body data are not objective just because they come from the body. The researcher makes many small choices, and each can change the result. If another person cannot repeat your session from your notes, your result cannot be checked. This step covers objectivity.
Fix these before the first participant arrives:
- A written script. Every participant hears the same instructions, read the same way, ideally by the same person. Instructions read from memory or by different people can confound results.
- One room, one setup. Keep temperature, humidity and lighting steady, and place furniture, sensors and the robot in the same spots. Room conditions can affect skin conductance and pupil size.
- A fixed time of day. Body signals shift over the day, so test at similar times or record the time.
- A preparation rule. Tell participants what to avoid beforehand, such as caffeine, and ask what they had.
- A sensor routine. Always place and fit sensors the same way. For the ring, note the finger and the sizing shim used.
- A calm social setting. Being watched can change performance and reactions. Build rapport, keep the setting low-pressure, and keep the experimenter’s behavior consistent.
For every session, write down:
- Participant ID, date and time
- Room temperature
- Who ran the session and which script version
- Which finger and shim size the ring used
- Caffeine that day
- Anything unusual, such as a sneeze during play 2
Step 4: Record cleanly
A clean recording follows the same order every time. Here is the flow for one participant, with what to capture at each point.
- Prepare. Greet the participant, explain the session using the script, and fit the sensors. Check that each signal looks sensible before you start.
- Record a baseline. Have the person sit quietly. Body signals are best analyzed as change from a person’s own resting level, because people start from different places. The paper describes baselines of a few minutes up to 10 to 15 minutes, so pick a length and keep it the same for everyone.
- Mark every event. Log the exact moment each greeting starts. Without time markers you cannot line the signal up with what happened.
- Play the stimulus. Repeat the greeting several times in the same way. Capturing several scores of the same measure and averaging them helps random error cancel out.
- Look in the right window. Skin conductance responds to a single event within about 3 seconds, which the paper uses as its example window. Slower signals, such as blood-flow measures, need longer windows.
- Collect the survey right after, while the experience is fresh.
- Debrief and remove sensors. Note anything that went wrong.
Keep these records:
- The raw signal, never overwritten, because you may need to reprocess it with a different method.
- Event markers with timestamps, because they line the signal up with what happened.
- The session sheet from Step 3, because it lets someone else repeat your session.
- Problems, such as a loose sensor or movement, because they explain odd data later.
Two rules from the paper:
- Sample fast enough. If a signal is recorded too slowly, it produces false patterns that cannot be repaired afterwards. The paper warns against EEG below about 20 readings per second and heart recordings below about 2 per second.
- Decide how you will handle outliers before you look at the data, and write the rule down.
Step 5: Check the tool is steady and sensitive enough
Run a small pilot before the real study. It answers two questions at once: does the tool give steady readings (reliability), and can it notice the size of difference you care about (sensitivity)?
Here is a pilot plan using the ring and a Furhat greeting:
- Pick a small group and test each person twice, one week apart. Use the same people both times. New people in session 2 would mix person differences with tool wobble, so you could not tell which caused a change.
- Run the same session both times: a baseline, then the same greeting played several times (5 is an example, not a rule). Too many repeats can make the response fade as people get used to it.
- Average each person’s repeats. For each person and session, measure the rise above baseline for every play, add the rises, and divide by the number of plays. Example: 0.4, 0.6, 0.5, 0.3 and 0.7 microsiemens add to 2.5, so the average is 0.5.
- Check steadiness. Compare each person’s session 1 average with their session 2 average. If people who reacted strongly the first time react strongly again, the tool is steady for this task. The paper cites retest correlations for skin conductance measures of roughly 0.3 to 0.85 depending on the feature, so do not expect a perfect match.
- Measure the usual wobble, meaning how much a person’s repeated readings vary on their own.
- Check sensitivity. Is the difference you care about, such as a warm greeting versus a neutral one, bigger than the usual wobble? If a gap of 0.02 sits inside a wobble of 0.10, the tool cannot tell the greetings apart.
- If it is not sensitive enough, average more repeats, keep the ring on the same finger and shim, keep the room steady, make the difference between conditions bigger, or choose a more precise tool.
Write down the pilot’s numbers, the wobble you found, and what you changed because of it.
Step 6: Read the results without over-claiming
The last mistake is in the sentence you write about the data. A body signal supports a narrower claim than it seems to, and different kinds of measures often capture different sides of an idea.
Treat measures as complements, not substitutes. A thermometer says 30°C, but you say it feels cooler because of the wind. Both are true, because they measure different sides of “hot.” In the same way, the ring may show the body was aroused while the survey says “I felt fine.” Do not throw one away. Report both and ask what each side shows. A mismatch is not automatically an error.
Match your wording to what the signal can support:
- Skin conductance rose when Furhat spoke. You can say arousal rose. Do not say the person saw Furhat as having a mind, unless other measures back it up.
- Pulse rose. You can say activation or effort rose. Do not say the person was stressed or afraid.
- Survey and ring disagree. You can say the two measures captured different sides. Do not say one of them is wrong.
- A finger path curved toward “override” before accepting. You can say the person hesitated. Do not say the person distrusted the robot.
Before you claim a cause, ask what else could have produced the signal (the idea itself, a startle, nerves, a warm room), and which of your other measures rules those out.
Finally, report enough detail for someone to repeat your work: the script, the room, the sensor setup, the filters, the baseline length and how you handled outliers. The paper suggests online appendices when there is too much for the article.
The one-page checklist
Print this and keep it with your session sheet. Each item is one of the paper’s six checks.
- Validity: am I measuring what I think? Define the idea, list its sides and pick a measure for each side. Write down the definition, the sides and the measure for each.
- Diagnosticity: could something else cause this signal? List other causes, add measures that separate them, and control the avoidable ones. Write down the list and how you handle each.
- Sensitivity: can the tool see differences this small? Pilot with a big known difference, then compare your real difference against the usual wobble. Write down the wobble and the gap you care about.
- Reliability: does it give the same answer twice? Test the same people twice and average several repeats. Write down both sessions’ averages and how closely they match.
- Objectivity: could someone else repeat this? Use a script, a fixed room, a fixed time, the same sensor routine and a consistent experimenter. Fill out a session sheet for every participant.
- Intrusiveness: is the equipment disturbing the task? Prefer lighter sensors and justify any heavier one. Write down why each sensor is worth its disturbance.
Common mistakes to avoid:
- Treating one signal as proof of one feeling.
- Skipping the pilot.
- Changing the room, script or sensor routine between participants without noting it.
- Throwing out a survey result because the body signal disagrees.
- Writing “the person felt X” when the data only show “arousal rose.”
Short review of the paper
The paper is a practical, clear guide to measurement quality. It is most useful as a checklist you apply before a study, not as a theory to admire.
What it does well
- It gives six memorable checks that cover most of what reviewers will ask.
- It corrects a common myth: that body data are objective and reliable by default. It shows, with test-retest evidence, that they are not.
- It is written for information systems researchers who are not neuroscientists, and it explains the nervous system briefly before using it.
- Its section on the experimenter’s influence (script, room, social setting) is easy to act on and often overlooked.
Where it falls short
- It is a 2014 editorial, so it does not cover newer tools such as finger-worn rings or newer wearable sensors in any depth, and it says little about robots or AI.
- It names the six factors but gives few cutoffs or step-by-step procedures, which is why this guide adds worked examples.
- Much of its evidence comes from fMRI and EEG studies, so some advice transfers loosely to skin and pulse sensors.
- It says what to report, but not how much detail is enough.
Who should read it: anyone planning a study with body sensors, and any reviewer who needs to judge one.
Verdict: read the paper for the logic, and use the checklist above for the doing. Treat the lab examples here as starting points to confirm with your own lab.
Source: Riedl, R., Davis, F. D., & Hevner, A. R. (2014). Towards a NeuroIS research methodology: Intensifying the discussion on methods, tools, and measurement. Journal of the Association for Information Systems, 15(10), i–xxxv. Equipment details: BIOPAC Research Ring.